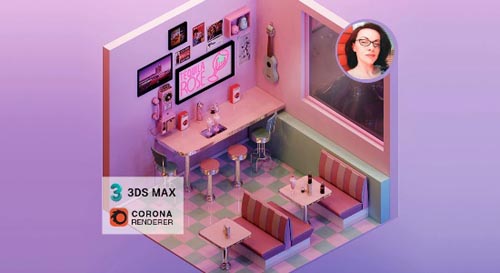
Udemy – Rendering an Isometric Retro Dine
Admin2
24-Jun-21
0
Related Articles
Corona Renderer 1.6.3 for 3DS Max 2012-2018
On 21-Oct-17
by
Corona Renderer 1.6.3 for 3DS Max 2012–2018 max | Plugins...
Corona Renderer 1.6.3 for 3DS Max 2012–2018 max | Plugins...
Corona Renderer 5 Hotfix 2 for Cinema 4D R14-R21 Win
On 12-May-20
by
Corona Renderer 5 Hotfix 2 for Cinema 4D R14-R21 Win...
Corona Renderer 5 Hotfix 2 for Cinema 4D R14-R21 Win...
MographPlus - Comprehensive Introduction to Corona for Cinema 4D
On 09-Sep-19
by
MographPlus – Comprehensive Introduction to Corona for...
MographPlus – Comprehensive Introduction to Corona for...
Corona Renderer 4 Hotfix 1 for 3DS MAX 2013-2020
On 13-Nov-19
by
Corona Renderer 4 Hotfix 1 for 3DS MAX 2013-2020...
Corona Renderer 4 Hotfix 1 for 3DS MAX 2013-2020...
Corona Renderer 4 (hotfix 1) for 3ds Max 2013 - 2020
On 06-Dec-19
by
Corona Renderer 4 (hotfix 1) for 3ds Max 2013 – 2020 max |...
Corona Renderer 4 (hotfix 1) for 3ds Max 2013 – 2020 max |...

Udemy – Rendering an Isometric Retro Dine
Duration 2h 30m MP4
==========
Info:
Rendering an Isometric Retro Diner in Autodesk 3ds Max and Corona Renderer
What you’ll learn
Introduction to Corona Render – a Physical-based render engine
Environment lighting with HDRIs and setting-up the LightMix Feature
Materials and Texturing basics in Autodesk 3ds Max and Corona Render
Style, Planning and Inspiration + Project Management Tools
In-depth lighting techniques in Autodesk 3ds Max and Corona renderer
Storytelling through Lighting in Corona LightMix feature
Orthographic Camera Settings
Render High resolution Images
Post-processing in Corona Frame Buffer
Additional Tips: Storytelling in your Portfolio
Requirements
A desktop computer or a laptop with an Autodesk 3ds Max license (full, student or demo)
Basic understanding of 3ds Max interface
Downloading the Project Files
Description
Welcome to my retro diner! In this course we focus on rendering in a high-performance (un)biased physical renderer which is Corona renderer. We will cover the basics for this render engine starting from its toolbar.
This is a practical, project-based course combining follow along lessons with visual-based explanation. You will work on this isometric retro diner scene available to download when you subscribe to my course.
The course contains 6 sections, each focused on a specific feature.
In Section 1 we’ll start by introducing Corona Renderer – which is a physical-based render engine. We will go through the Corona render toolbar and explain what each tool does. Next we will have a glimpse of our LightMix feature, set it up and see its potential! You will be able to change the lighting and atmosphere in your scene and tell different stories!
Section 2 it’s about getting inspiration. We will create two different moodboards for our diner and show you user-friendly project management tools in order to keep organised.
Section 3 is focused on Corona Materials and texturing using different workflows in 3ds max material editor.
Section 4 is dedicated to in-depth lighting. We will set-up HDR images for our environment lighting, then we learn about the basics of Corona Lights and how to use directionality, maps and �.ies’ files to give depth and interest to our scene.
In Section 5 we come back to the LightMix feature focusing more on setting it up and practicing. This is a practice-based section where we’ll use lighting to create different moods for our scene in order to bring forward our storytelling skills.
And finally in Section 6, we’ll tackle camera and rendering set-up. We’ll learn the exact settings to create a high res final render. Our purpose is to create a production-ready image straight from our 3d file but we’ll also save our render elements which gives us the flexibility to choose different post-processing tools. Here though, we are not using external tools such as photoshop, but only the in-built tools we have in Corona render.
At the end of this course I will give you a practical demonstration of how to apply what you learned in your own work and enhance your portfolio. And please don’t forget to write a review, your opinion is highly appreciated!
Who this course is for:
Beginner to Mid-level 3d artists, architectural visualisers, concept artists
Visualisers who are familiar with 3ds Max and V-ray and want to switch to Corona render
3d artists wanting to improve their lighting skills
2d artists who want to get into 3d
DOWNLOAD HERE :
https://seekvn.com/file/00c81acbaf7171a3c899b402083cf07f/UdemyRenderanIsometricRetroDiner.part1.rar.html
https://seekvn.com/file/d36a292b6f94e89b3aa1c0b1e0375c29/UdemyRenderanIsometricRetroDiner.part2.rar.html
https://seekvn.com/file/add252cd1ab8063c86f47ac44c49b211/UdemyRenderanIsometricRetroDiner.part3.rar.html
https://seekvn.com/file/e9368995c444e1f7aa98d8c451b86299/UdemyRenderanIsometricRetroDiner.part4.rar.html
Information
Users of Guests are not allowed to comment this publication.
