FXPHD – VFX307 – Advanced Environments – Juggernaut Bend Project
cod2war
15-Aug-20
0
Related Articles
FXPHD – ENV150 – Introduction to Clarisse for Environments
On 11-May-20
by
FXPHD – ENV150 – Introduction to Clarisse for...
FXPHD – ENV150 – Introduction to Clarisse for...
FXPHD - MYA310 Lookdev and Lighting with Maya and Arnold
On 26-Jul-17
by
FXPHD – MYA310 Lookdev and Lighting with Maya and Arnold 5...
FXPHD – MYA310 Lookdev and Lighting with Maya and Arnold 5...
[Tutorials] fxphd course: Look Development using Maya and Arnold
On 02-May-16
by
fxphd course: Look Development using Maya and Arnold 10...
fxphd course: Look Development using Maya and Arnold 10...
FXPHD – ENV240 Intermediate Clarisse for Environments
On 06-Aug-20
by
FXPHD – ENV240 Intermediate Clarisse for Environments...
FXPHD – ENV240 Intermediate Clarisse for Environments...
Skillshare – Clarisse iFX – First steps: Everything you need to know get creating!
On 18-Oct-20
by
Skillshare – Clarisse iFX – First steps: Everything...
Skillshare – Clarisse iFX – First steps: Everything...
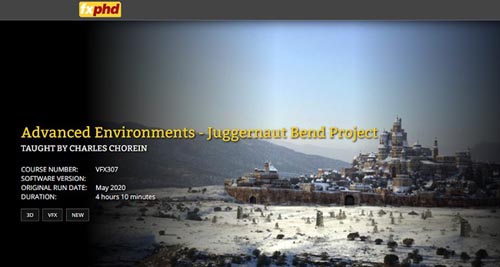
FXPHD – VFX307 – Advanced Environments – Juggernaut Bend Project
Duration 4h 10m Project Files Included MP4
==========
Info:
CLASS 1: PHOTOGRAMMETRY
This class give us the opportunity to go through the workflow in RealityCapture with our Drone footage from the preparation of the images sequence in Nuke to the render in Maya Arnold and Clarisse. In Reality-capture we will generate the 3D mesh, align and orient properly the mesh, understand the bounding box concept, create some UVs and UDIM’s and export an OBJ and TIF textures. Finally, we will jump in Maya and reconnect everything to get our final Layout asset in Arnold.
CLASS 2: LAYOUT IN CLARISSE
We got from RealityCapture our 3D mesh generated, textures and Camera, it’s time to set up everything in Clarisse. We will prepare our 3D asset in Maya and export everything as an Alembic file. In this class we will explore in Clarisse the scattering tool and how quick and efficient Clarisse can be to generate our layout with boats, tent, towers for our shot.
CLASS 3: LOOK DEVELOPMENT IN CLARISSE
In this class we will do a lookDev for each asset. Explore the Standard shader and convert our TIF texture file to TX files for memory efficiency. Without texture optimization, the RAM could quickly overload. We will go through the Material Editor and connect all our maps to get our lookDev for each asset.
CLASS 4: LIGHTING IN CLARISSE
Before jumping straight to the lighting tool in Clarisse, we spend couple of minutes analylzing the plate and understand lighting. Setup of the lightRig with Environment and Directional Lights and explain how the different parameters work to match to the plate and integrate the CG assets.
CLASS 5: RENDERING IN CLARISSE
Creation of the Grey, Beauty and Shadow/Reflection passes and renders. An exploration as to how ShadingLayer and groups work in Clarisse and how it’s important to keep the Clarisse scene tight up in the Browser. A CG slap comp of all our renders in Nuke and get a solid version for the next department.
CLASS 6: MATCHMOVE PART 1
This three part section, taught by Environments Generalist TD Michal Skowrow (Dneg London), walks you through the process of recreating a virtual camera based on the DJI Mavic 2 Pro drone footage. The entire matchmove pipeline is covered, starting with an overview and gathering of necessary data, de-noising plates, reconstruction of the drone lens, matchmoving the camera, working with the class three photogrammetry to line-up the camera, creation of distortion plate, and how to use it inMaya to Nuke workflow.
CLASS 7: MATCHMOVE PART 2
The second of three classes covering the matchmove process. Michal Skowron has worked for Framestore, MPC and Dneg and also as a university lecturer. He has contributed to larger and smaller productions both in film and TV, product, automotive and medical visualization. Projects include Gravity, Disney Jungle Book, The Martian and more recently the Black Mirror and Chernobyl TV series.
CLASS 8: MATCHMOVE PART 3
The third of three classes covering the matchmove process.
DOWNLOAD HERE :
https://seekvn.com/file/580ade5eb1a5c89bf4a58ded5ce260aa/FXPHDVFX307AdvancedEnvironmentsJuggernautBendProject.part1.rar.html
https://seekvn.com/file/fc78bf47f6a28d58549b58e8169f0406/FXPHDVFX307AdvancedEnvironmentsJuggernautBendProject.part2.rar.html
https://seekvn.com/file/b6b0c52389e64a1da767f64f81090ba1/FXPHDVFX307AdvancedEnvironmentsJuggernautBendProject.part3.rar.html
https://seekvn.com/file/56714900b96a516687b8a9fe89cb807c/FXPHDVFX307AdvancedEnvironmentsJuggernautBendProject.part4.rar.html
https://seekvn.com/file/3a1a2ca2a8d86a5a436c777ab57779dc/FXPHDVFX307AdvancedEnvironmentsJuggernautBendProject.part5.rar.html
https://seekvn.com/file/9e9dca1036dc0f7c571015c4629d5f4f/FXPHDVFX307AdvancedEnvironmentsJuggernautBendProject.part6.rar.html
https://seekvn.com/file/1aa50f2de849ed7a43a36535f5d96103/FXPHDVFX307AdvancedEnvironmentsJuggernautBendProject.part7.rar.html
https://seekvn.com/file/631eefbbce8f31f73d834b29afe1b79d/FXPHDVFX307AdvancedEnvironmentsJuggernautBendProject.part8.rar.html
DOWNLOAD
You must login to show this link. No account? Create Account Category: TutorialsInformation
Users of Guests are not allowed to comment this publication.